Archive for the 'Mr. FixIt' Category

31 Jul 2017

Posted by under Dave's Thoughts,Mr. FixIt

Better Living through Hydraulics

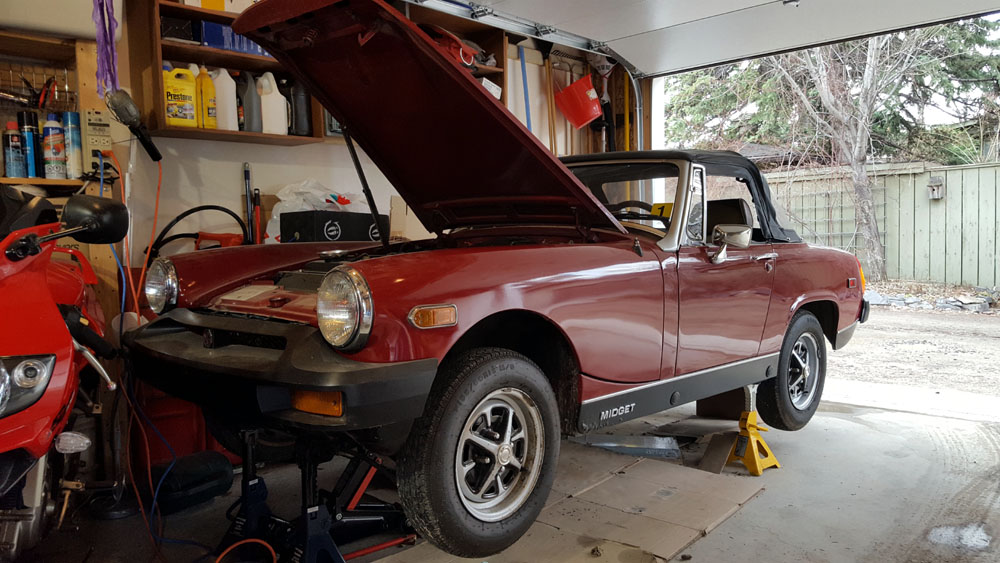
With one day to spare before my weekend clutch repair on the Midget rolled over into a 5th month of work, I got the car on the road for it’s maiden voyage for 2017. Well, it was less of a maiden voyage than a fingers-crossed “hope this thing will stop” test of the braking system up and down the local side streets. The MG did stop when requested, the gears shifted without complaint and the handling was improved due to the rear suspension fixes. Overall, a successful repair effort despite the large number of weeks elapsed and the great number of hours of work.

A lots of effort just went into cleaning up decades worth of grime and making efforts to take care of the details. For example, every fastener that got re-used (many were replaced where possible) got cleaned up on the wire wheel and had the threads chased with tap or die. Some parts were given a fine sanding or polished depending on what was needed. Lot’s of the type of task that would never be done by a shop as just too time consuming. For the most part, no one who is unwilling to lie on the ground with their head under the rear bumper will ever see the pieces that got this kind of attention!

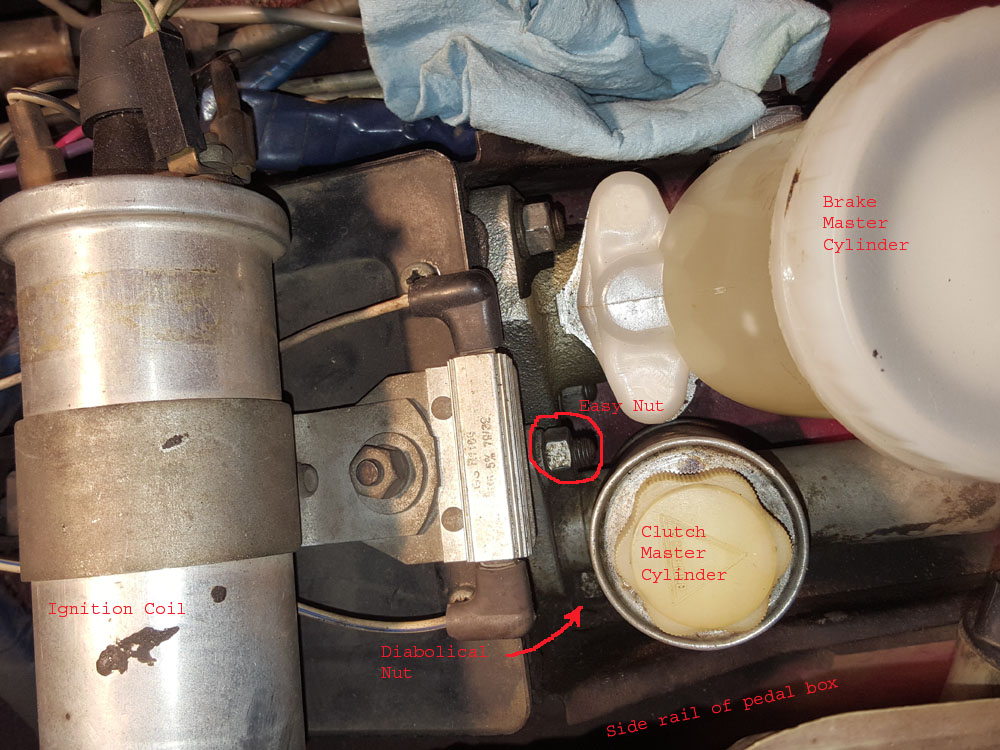
And the things that you have to learn the hard way – like the order of operations when reinstalling the clutch slave cylinder. It’s easier to bleed if the slave is left loose and as low as possible under the car – except for the small problem that the slave can’t be fitted into it’s housing with the hydraulic line attached. The result is that the line must by disconnected and then, while forcing the slave into place, the clutch pushrod compresses the slave piston and all the hydraulic fluid spurts out the line fitting. And, of course, the contents of the master cylinder dribble out of the line at the same time. What a mess. Then the bleeding process starts over.

Interestingly, the final step in bleeding the clutch is highly satisfying. After a couple of hours of struggling with the installation and bleeding of the clutch, there were still a couple of tiny bubbles trapped at the high point of the line which is translucent, so you can see what’s going on. The line curves up from the master to be able to “make the corner” down beside the battery into the space beside the transmission where the slave cylinder lives. Air bubbles at the high point are exceedingly reluctant to flow downhill in either direction making Midget clutch bleeding a source of huge frustration. It turns out that the recommended solution is to kick the living daylights out of the clutch pedal. 50 kicks, as fast as possible, is the prescription – I figured if 50 is good, 60 would be better. Sure enough, in the mid 40’s the pedal feel started to come back and by the time I got to 60 it felt just right and no bubbles were left in the line.

After that, it was a matter of getting the wheels back on and lowering the MG from the jack stands after nearly a year in the air and firing it up. Over the next few days, there are a few remaining tasks – the hood needs to be re-fit and a year’s worth of dust needs to be washed off and it’ll need a coat of wax. Then, it will be time for some long awaited top down cruising on the long weekend. See you in Bragg Creek!

Comments Off on Better Living through Hydraulics

14 Jun 2017

Posted by under Dave's Thoughts,Mr. FixIt

Kneebone’s Connected to the Thighbone…

Like the old song “Dry Bones“, the progress on the Midget is a string of connected activities that I trust will end up with a resurrected vehicle; preferably before freeze up. Although prescient, my list of things yet to be done back at the start of April seems to have fallen far short of reality and a lot of work is accruing to the “fix other stuff” item on the list.

As I’ve worked away on the car since the start of April, I’ve discovered that the clutch hydraulics bone is connected to the brake hydraulics bone,
   which is connected to the pedal box bone,
      which is connected to the “buy a sandblaster” bone,
         which is connected to the rear brake shoes bone,
            which is connected to the leaf springs bone,
               which is connected to the rear axle bone…

I think you get the picture. To make it even more interesting, some bones were connected with 35 years’ worth of rust and corrosion that did not yield gracefully to the gentle persuasion of the spanner. Much to the delight of aftermarket parts retailers in the US, I’ve had to order another few hundred dollars worth of bits and pieces – mostly for the rear suspension. The price for the parts isn’t too bad, even with the 35% exchange rate premium on the US dollar – it’s the shipping that is the killer. The last order was for about $200 CAD worth of parts and the shipping, brokerage, duty and taxes was another $125 CAD – 60%! Unfortunately, getting parts in Canada is basically impossible.

So, after more than two months of this project I still haven’t actually fixed anything, but I might. I’ve removed the entire rear end from the car end have completely disassembled the rear suspension. The clutch hydraulics are still out as is the brake master cylinder and all the rear hydraulics. I made a false start on the rear brake shoes, springs and wheel cylinders – re-shoeing the left side before deciding to take out the axle. I’ll end up re-doing that bit of work later on.

Lately, I have been working on taking the rust off the axle and suspension parts, lots of hours of cleaning up oily gunge, wire brushing, sanding and media blasting to get the parts cleaned down to bare metal. Just this past week, I finally started to reverse the process of undoing stuff by priming the suspension parts, pedal box, clutch pedal and brake pedal. Hopefully, the next few weeks will see the rear axle and springs repainted and then I can start reassembling some of dem bones that I’ve disconnected.

Comments Off on Kneebone’s Connected to the Thighbone…

22 Apr 2017

Posted by under Dave's Thoughts,Mr. FixIt

Pedal Box

The progress on the Midget continues, but pretty slowly. April has been quite cold and lots of showers/rain/freezing drizzle/snow – sometimes all in the same hour. This has stretched out the MG repairs by almost three weeks now. Well it’s not just the weather – there was some time spent shopping for new tools. The pedal box, clutch and brake pedals weren’t in very good shape, paint was shot and there was some rust. Since the shapes are complex I figured that wire brush and sandpaper was not going to work out too well. Clearly I needed to sand blast. And I don’t own a sand blaster.

First things first. Although “sand blasting” is the term most people know and use, the current term is “media blast”. Sand is not used much because it has health risks; you can get silicosis from breathing the dust from the shattered grains of sand. It also is less effective than a bunch of alternatives that are available, everything from baking soda to copper slag. I settled on an inexpensive siphon system rather than a blast cabinet. The cabinet would have been nice, but I don’t know how much sand blasting I’ll be doing and I really don’t have room in the garage anyway. My air compressor is also borderline for the required air flow and pressure. Blasting takes a lot of air. Even so, the inexpensive option still cost about $120 for the gun and container, gloves, particulate filter mask, eye protection and a 25kg bag of glass bead media.

The glass bead blasting, does do a pretty good job – for about 90 seconds, til the compressor tank pressure runs down and you have to give it time to catch up. Every minute of blasting needs about two minutes of compressor time, maybe more. And, the mess! I did the first tests just outside the garage in the alley. The breeze, though light, was an issue and I soon realized that a better approach would be needed. As it turned out, the answer was to set up the drill press with a wire wheel or cup and clean as much as possible on the parts. Then, the bead blasting was only needed to get the really tight, difficult areas. That allowed me to get the three parts all done with minimal effort. I also ran the air hose round to the sheltered area beside the garage (and kept the garage door closed) where I did the blasting in a big cardboard box. The mess was, more or less, contained that way.

Today, I was hoping to paint the parts. I picked up some primer, satin black and clear coat then spent some time cleaning, degreasing and masking. Unfortunately, the afternoon kept getting colder and then it started raining – not ideal for painting which needs some warmer temperatures and not too humid. The weather forecast for the next few days doesn’t look good, so I think this project will take a while longer yet.

Comments Off on Pedal Box

02 Apr 2017

Posted by under Dave's Thoughts,Mr. FixIt

No Fool

… like an April Fool!
However, unlike some people or companies, like WestJet, with their clever April Fool’s Day gags, I chose to celebrate the day differently. The first of April is the anniversary of the day that I purchased my MG Midget back in 1985. In the intervening 32 years, I’ve driven it a lot or a little depending on the demands of family life and the vagaries of 70’s era English engineering and manufacturing. After a pretty good year in 2015, last year was dismal as both life and British reliability took a major toll on sports car usage.

I took it out last year at the end of March and after a quick spin around the neighbourhood, discovered a small coolant leak in one of the heater hoses. Not too serious, and despite having been unemployed for six months at that point the repair could be squeezed into the budget. But I didn’t get after the repair right away and, a few weeks later I went to start the car again and the clutch pedal went straight to the floor – no pressure at all. No obvious signs of leaking – until I jacked the car up and the underside of the transmission around the slave cylinder is all wet, and it seems clear that the slave cylinder is having issues. Given that replacing the slave without attending to the master cylinder is a recipe for doing the job twice, the whole hydraulic system would probably need replacing. But not right away. Austerity measures were in full force by early summer of 2016 and the job market was still flat.

So, now that the car has been up on jack stands, patiently waiting for some attention for many months – the temperature in the garage finally was warm enough to lie on the concrete (using 2 luxurious layers of cardboard for comfort) and tackle the job. And, that’s just what I did yesterday. On the 32nd anniversary of purchasing the Midget, I pulled the slave cylinder out. And the ignition electrics. And the brake master cylinder. And the clutch and brake pedals. And the pedal box. And then, finally, the clutch master cylinder. And, during the 7 hour process, I soundly disparaged the intelligence, character and parentage of the English designers at British Leyland and MG.

For you see, there are 2 captive bolts on the pedal box that the clutch master cylinder (CMC) flange secures to with 2 nuts, one above and one underneath the CMC. But because the CMC reservoir is a tin can soldered to the body of the master, and the pedal box rail is right there, no tool in my possession can both get onto the diabolical lower nut and have enough room to turn. Searching the internet wasn’t all that helpful, this appears to be everyone’s experience. Some have success with bending, hammering and grinding an old wrench into shape; or they have magical thin walled sockets, adapters and double-jointed wrists. Most seem to suggest loosening the pedal box (held on by 2 screws + 3 bolts + 2 difficult bolts + 1 stupid bolt), to gain a little room underneath.

But, no. Not so fast there, young apprentice. The routing of my brake lines prevents me from lifting the pedal box enough. So now it is decision time. If I pull the lines off the brake master cylinder (BMC) then I’ll need to bleed the brakes. And I have, as a separate project (not this weekend!), the job of doing the brakes on all four corners, so that means the clutch and brake jobs would have to be completed before the first run of the season. But, no amount of wiggling will gain the room I need to get to the diabolical nut. So, off come the brake lines. And then, finally, I can get a wrench on the diabolical nut and off comes the clutch master.

Success Level: Pyrrhic.

By this point I’ve gone far enough that I am starting to realize how grotty the whole pedal box area is and decide that, since this is completely out of hand now, I might as well pull the pedal box and clean up that whole area. So off come the pedal springs, then the clutch pedal and finally the pedal box. So now, to fix the clutch hydraulics, I have to:

  1. clean up the pedal box (sandblast? powdercoat?)
  2. fix up the pedal pivot (new pivot bolt?)
  3. front brakes (rotors, calipers, pads and brake lines)
  4. rear brakes (cylinders, shoes, brake line)
  5. reinstall the master cylinders to the pedal box
  6. install the clutch slave cylinder
  7. reinstall the pedal box
  8. hook up the brake and clutch lines
  9. bleed the clutch and brakes
  10. fix other stuff that goes sideways in the meantime
  11. Comments Off on No Fool

« Prev - Next »