Archive for the 'Mr. FixIt' Category

02 Jan 2015

Posted by under Dave's Thoughts,Mr. FixIt

Well, that’s just Grand.

One of the most difficult things to come to terms with when purchasing a new house is the sense of disappointment that comes with realizing that you’ve spent All That Money™ on a place built by clowns.

The house in Chestermere suffered from this problem. When we went to develop the unfinished basement we had to deal with the reality that the builder had intentionally made decisions to place every single item in the basement (furnace, hot water tank, electrical panel, sump, bathroom rough-in – even the teleposts) in the poorest location possible. Not simply in awkward or inconvenient locations, but the worst possible locations. The cost and effort to work around the stupidity was considerable.

Fast forward to this year – we’ve moved into the city into another new house. The aesthetic standards have changed a lot over the last 15 years. Cabinetry is better, granite counter tops are virtually standard fare, bathrooms are like spas and many of the houses that we looked at had features that were inconceivable just 10 years ago. And yet… the standard of workmanship is appallingly poor – particularly for anything that is ‘behind the scenes’.

You wouldn’t believe the length of the list of things that we’ve discovered in this new house that are poorly designed then carelessly built. I won’t torment you with the list as much of it will likely show up as Mr Fixit posts down the road. However, this week I found one that just made me shake my head.

I was all set to wash Chloe in the laundry room sink and discovered that the “pull-out” handle on the faucet would only pull out by about 3 inches. I figured that the hose was tangled around something that we had stored under the sink. So, I took a look. Turned out that the hose was tangled around the plumber’s miniscule IQ – and the drain pipe.

Fortunately, the hose had just enough give to pull past the stub of the drain once I removed the p-trap. It could have been nasty otherwise since the hose would have been virtually impossible to remove from either side of the tap fixture. At least it turned out to be a pretty easy fix for a situation closer to “annoyance” than to “crisis”. It does show clearly the absence of quality workmanship in the building of the house.

Grand Homes Ltd of Calgary was the home builder. You can see by their website the degree of commitment that they have to stand behind their work. They are, for all intents and purposes, a fly-by-night outfit that no longer exists as an operating business. Making claims against them for unfinished work during the warranty period was basically pointless, they were exceedingly difficult to contact and when it came right down to it the key question became whether they even had the capability to fix anything properly. Or if we even wanted them to.

I was showing a friend around the house and, as guys do, we were in the furnace room discussing this very issue. I mentioned my frustration with workmanship that looked like it had been done by chimpanzees. My friend’s response? “Chimpanzees? There’s no way. Chimps are great apes; this is clearly the work of monkeys!”

No Comments »

24 Nov 2013

Posted by under Mr. FixIt

Toasty again

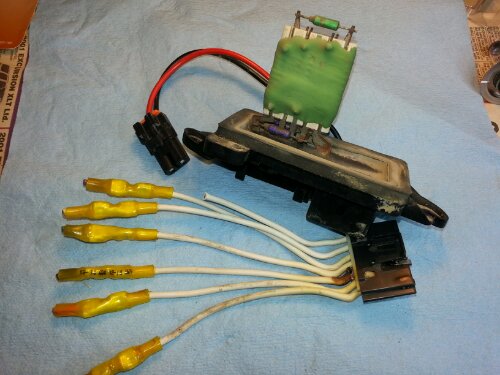
20130508_131123Another weekend and another repair project. It’s been quite a year for repair work, mostly plumbing (kitchen tap, shower valve, toilet valve) but some vehicle work too. This weekend it was the Behemoth (our 2004 GMC 3/4-ton work truck) that needed help. Heater fan stopped working on the highest setting some time ago, but I didn’t worry too much because the other four fan speeds were more than adequate. imageThen two weeks ago Brenda had to go out of town and the weather was nasty so, she took the Behemoth – aggressive tires and 4-wheel drive.

On that trip the heater fan worked only intermittently, to get heat where it was needed you had to wiggle some wires under the glove box. Time to do some research. It turns out that the culprit is a big ol’ resistor in the duct work near the blower motor. P1120358It is in the air flow and has a tendency to corrode in all the warm, moist air and fail. Couple of web forums mentioned how it’s not usually a big deal unless it catches fire…

Good enough for me! Off to the parts store for a new resistor ($60). Today was warm (+5°C and chinook winds) so after lunch I had a go and immediately hit a problem when I saw the connector. Insulation burned right off one wire and two pins scorched and melted. Not to mention that, judging by the butt connectors, it’s not the first time this has had to be done.

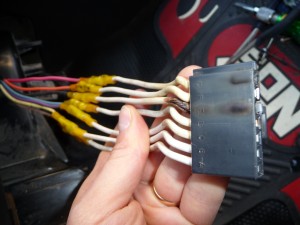
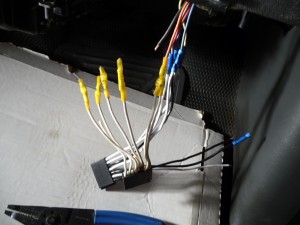
P1120363So, off I went, it took visits to three Part Source stores and one NAPA, but I finally found the correct harness connector. It took 2½ hours before I got home and working again, needless to say that the day was no longer quite so warm and my light was gone. D’Oh. Fortunately the repair was straight forward, if a little hard on the back working in the passenger foot-well. I considered soldering the joints but just didn’t have enough hands for that, so it was back to the crimped butt joints.

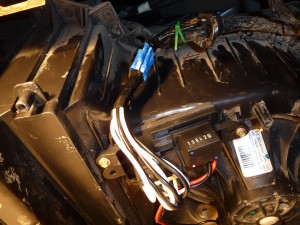
P1120369It all went back together pretty smoothly and works quite nicely – even on fan speed 5. So now the Behemoth is good to go for the next winter road trip in the snow. We are going up to Red Deer tomorrow night to catch a (hard to get tickets for) theatrical showing of the Doctor Who 50th anniversary episode. Hopefully the weather will be fine and the roads clear, but if not, we are ready!

No Comments »

20 Oct 2013

Posted by under Dave's Thoughts,Geekstuff,Mr. FixIt

Click of Death

DSC06282When we developed the basement, back in 2007, we included a home theater with a big (for the time) flat screen TV. We did quite a bit of research on televisions, eventually buying a Samsung 46″ LCD TV for a bargain price (for the time) of somewhere around $2600. A lot of money, both then and now. Enough money that you might believe that you had purchased a high quality item that would provide many years of reliable service.

But, no.

After only about 3 years, we had some kind of problem with the TV accepting certain kind of inputs (I don’t recall exactly what anymore). Although the TV was (just) out of warranty, I called Samsung support to see if there was a fix available – new firmware or whatever. Of course, there wasn’t. That wasn’t too unexpected, but the support tech’s recommendation ended up being, “Your TV is 3 years old, you should probably think about just replacing it”. As if! I found a workaround and we just carried on.

Until about six months ago.

It started gradually, not too noticeable at first – the TV would delay, just a bit, before turning on. Then the delay became noticeable and sometimes a soft clicking sound could be heard, but the set would come on and life continued. Fast forward, a couple of months and the startup delay went from a few seconds to a few minutes; the wait punctuated with a series of clicks emanating from the bowels of the machinery. Finally, one day in late September, it wouldn’t start up at all. Just clicking and blackness. The Samsung Click of Death had claimed another pricey victim. After the earlier experience with Samsung support, I didn’t think they would be too much help, probably a good assumption as at one point while searching for a fix, a local Samsung repair center gave me a ballpark estimate to repair of $300-$400. A current 46″ TV is less than $800 – not a cost effective repair.

Turns out that a lot of Samsung flat panel TVs had been assembled with faulty and/or undersized capacitors on the power supply board between about 2004 and 2010. In fact, bad capacitors from Taiwan affected a lot of electronics from about 2002 onwards. Mark actually figured this out and found some You Tube videos describing the problem and outlining the solution. Quite a simple solution actually, if you can manage a soldering iron. So, I took the TV apart one Saturday and found 5 blown caps on the power supply board. Then the trouble started – it turned out to be very difficult to actually find capacitors for sale in Calgary; wherefore art thou, Radio Shack!? Well there is always the interwebs- I found a place in Texas that sells Samsung TV repair kits and placed my order.

After 3 short weeks (!), the kit arrived in the mail and I got to work. It was a bit more challenging than I though it would be, since my 25W soldering iron just didn’t have the oomph to melt the industrial-strength solder on the power supply board. I had to head out at 10:00pm to buy a bigger soldering iron. However I did get the caps replaced without any particular drama and, when I reassembled the TV, it turned right on without any hesitation.

Total cost of the fix was about $65, including $50 for the new soldering iron and it took about an hour or so to do the actual job (not counting the shopping trip).

No Comments »

25 Mar 2013

Posted by under Dave's Thoughts,Mr. FixIt

Back on the Tools

It was a busy weekend. After celebrating my brother Scott’s birthday on Friday, he asked if I’d give him a hand sorting out his new laptop and getting a desk/work area in his new apartment. So on Saturday afternoon I headed over and we worked our way through the “to do” list. On the IT side, we configured his laptop, installed some software and set up some network attached storage for all his photos and media.

That was the easy part. His apartment is fairly small and there is an awkward little passage way into the kitchen that is currently set up as an open closet. There is no door and it just seems impractical for any real storage. At the same time, there is nowhere, other than the dining table, that is handy for a place to work. So we decided that it would be an ideal place to put a little desk to make a small office space. Only problem was that there was no power into the area.

That was fairly easily solved. A counter plug in the kitchen is located on the other side of the wall – it didn’t take too much effort to pop a hole in the drywall on the closet side and wire in a couple of outlets by extending the kitchen circuit. By the time we were done, it looked like it had always been that way.

image

Next was the desk surface – we used a quarter-sheet of 7/8ths white melamine faced MDF and cut it to fit. Some 1×2 “ledger boards” support the work surface on three sides. The desk size is a reasonable 23″ by 44″ – enough room for a laptop, keyboard, mouse and a small printer. I edge-banded the front with some melamine that I had at home (from the coffee maker install) and drilled some cord access holes along the back. We will do the final install one evening this week and add some LED lighting to complete the job. Later we intend to punch a hole through the wall between the work area and the living room to run an HDMI cable from the laptop to a TV on the other side.

That was Saturday. Sunday was a nice relaxing day – until the kitchen faucet keeled over and died. A little $2 plastic piece between the handle and the cartridge controls volume and temperature of the water. After 15 short years it got brittle and broke leaving the tap running (of course). I pulled the offending bit out of the tap and we headed to Home Despot – that little piece is, of course, not available except from the maunfacturer. How long would it take to figure out what we need, order it and get it in hand? How long can we go with out running water in the kitchen?

So we buy a new faucet. But wait – current styles no longer have spray hoses off to the side of the faucet (in the 4th hole on the sink deck), so what do we do with that 4th hole? Spend more money, that’s what. So we got a soap pump as well then headed home to do some plumbing. Turns out that there are no turn-off valves under the sink (stupid builder!) so I had to turn off the main shutoff valve – after everyone had a “go now, or hold on for the foreseeable future” trip to the washroom.

The old faucet came out fairly easily, once I figured out how to disassemble the spray handle. The new faucet was all pre-assembled with flexible supply lines so I figured the install would go quickly. But no, because the pre-assembled supply lines and spray hose all go through the center fitting on the tap, it is sized to just fit the hole in the sink deck. Sadly the holes through the counter top were under-sized (stupid builder!), so it took a while to cut and file the hole to the correct size. Once the faucet was in place, it turned out that the bracing on the underside of the counter was not recessed enough to allow the mounting backet to sit flush (stupid builder!). Out came the chisel to hack the required space out of the bracing – for both the faucet and soap dispenser.

Finally, everything was in place and the connections tightened. We turned the water back on and … no leaks! Success!

No Comments »

« Prev - Next »