31 Jul 2017

Posted by under Dave's Thoughts,Mr. FixIt

Better Living through Hydraulics

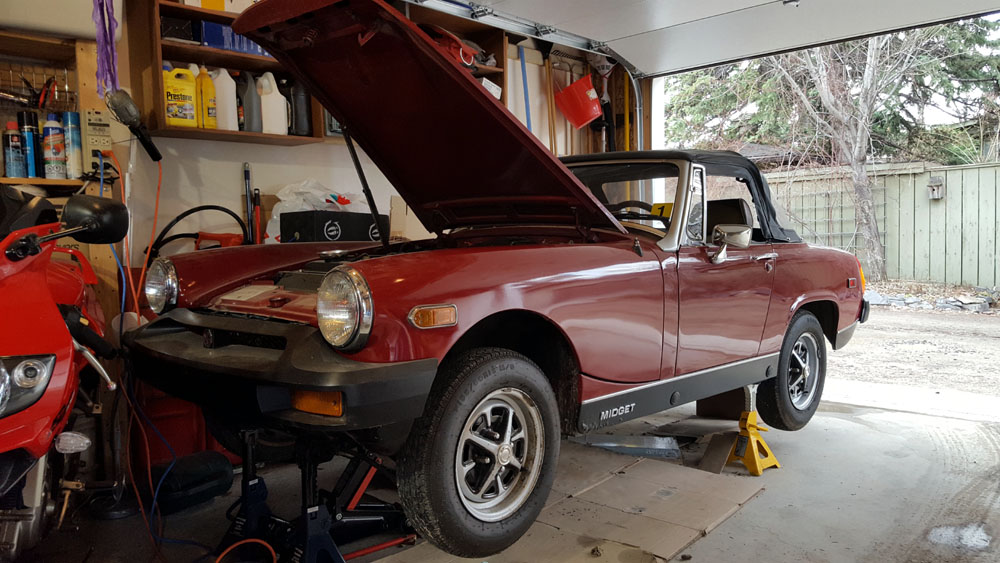
With one day to spare before my weekend clutch repair on the Midget rolled over into a 5th month of work, I got the car on the road for it’s maiden voyage for 2017. Well, it was less of a maiden voyage than a fingers-crossed “hope this thing will stop” test of the braking system up and down the local side streets. The MG did stop when requested, the gears shifted without complaint and the handling was improved due to the rear suspension fixes. Overall, a successful repair effort despite the large number of weeks elapsed and the great number of hours of work.

A lots of effort just went into cleaning up decades worth of grime and making efforts to take care of the details. For example, every fastener that got re-used (many were replaced where possible) got cleaned up on the wire wheel and had the threads chased with tap or die. Some parts were given a fine sanding or polished depending on what was needed. Lot’s of the type of task that would never be done by a shop as just too time consuming. For the most part, no one who is unwilling to lie on the ground with their head under the rear bumper will ever see the pieces that got this kind of attention!

And the things that you have to learn the hard way – like the order of operations when reinstalling the clutch slave cylinder. It’s easier to bleed if the slave is left loose and as low as possible under the car – except for the small problem that the slave can’t be fitted into it’s housing with the hydraulic line attached. The result is that the line must by disconnected and then, while forcing the slave into place, the clutch pushrod compresses the slave piston and all the hydraulic fluid spurts out the line fitting. And, of course, the contents of the master cylinder dribble out of the line at the same time. What a mess. Then the bleeding process starts over.

Interestingly, the final step in bleeding the clutch is highly satisfying. After a couple of hours of struggling with the installation and bleeding of the clutch, there were still a couple of tiny bubbles trapped at the high point of the line which is translucent, so you can see what’s going on. The line curves up from the master to be able to “make the corner” down beside the battery into the space beside the transmission where the slave cylinder lives. Air bubbles at the high point are exceedingly reluctant to flow downhill in either direction making Midget clutch bleeding a source of huge frustration. It turns out that the recommended solution is to kick the living daylights out of the clutch pedal. 50 kicks, as fast as possible, is the prescription – I figured if 50 is good, 60 would be better. Sure enough, in the mid 40’s the pedal feel started to come back and by the time I got to 60 it felt just right and no bubbles were left in the line.

After that, it was a matter of getting the wheels back on and lowering the MG from the jack stands after nearly a year in the air and firing it up. Over the next few days, there are a few remaining tasks – the hood needs to be re-fit and a year’s worth of dust needs to be washed off and it’ll need a coat of wax. Then, it will be time for some long awaited top down cruising on the long weekend. See you in Bragg Creek!

Comments Off on Better Living through Hydraulics

14 Jun 2017

Posted by under Dave's Thoughts,Mr. FixIt

Kneebone’s Connected to the Thighbone…

Like the old song “Dry Bones“, the progress on the Midget is a string of connected activities that I trust will end up with a resurrected vehicle; preferably before freeze up. Although prescient, my list of things yet to be done back at the start of April seems to have fallen far short of reality and a lot of work is accruing to the “fix other stuff” item on the list.

As I’ve worked away on the car since the start of April, I’ve discovered that the clutch hydraulics bone is connected to the brake hydraulics bone,
   which is connected to the pedal box bone,
      which is connected to the “buy a sandblaster” bone,
         which is connected to the rear brake shoes bone,
            which is connected to the leaf springs bone,
               which is connected to the rear axle bone…

I think you get the picture. To make it even more interesting, some bones were connected with 35 years’ worth of rust and corrosion that did not yield gracefully to the gentle persuasion of the spanner. Much to the delight of aftermarket parts retailers in the US, I’ve had to order another few hundred dollars worth of bits and pieces – mostly for the rear suspension. The price for the parts isn’t too bad, even with the 35% exchange rate premium on the US dollar – it’s the shipping that is the killer. The last order was for about $200 CAD worth of parts and the shipping, brokerage, duty and taxes was another $125 CAD – 60%! Unfortunately, getting parts in Canada is basically impossible.

So, after more than two months of this project I still haven’t actually fixed anything, but I might. I’ve removed the entire rear end from the car end have completely disassembled the rear suspension. The clutch hydraulics are still out as is the brake master cylinder and all the rear hydraulics. I made a false start on the rear brake shoes, springs and wheel cylinders – re-shoeing the left side before deciding to take out the axle. I’ll end up re-doing that bit of work later on.
Lately, I have been working on taking the rust off the axle and suspension parts, lots of hours of cleaning up oily gunge, wire brushing, sanding and media blasting to get the parts cleaned down to bare metal. Just this past week, I finally started to reverse the process of undoing stuff by priming the suspension parts, pedal box, clutch pedal and brake pedal. Hopefully, the next few weeks will see the rear axle and springs repainted and then I can start reassembling some of dem bones that I’ve disconnected.

Comments Off on Kneebone’s Connected to the Thighbone…

21 May 2017

Posted by under Dave's Thoughts,Family

Steven’s Graduation

A couple of weeks ago, we had lunch at the Calgary Tower in the revolving restaurant. We hadn’t been up the Tower for a few years and it has been a much longer time since we actually ate there. The occasion was Steven’s completion of his post-secondary program at SAIT where he has just completed his Diploma in Information Technology: Computer Systems. He did very well with a graduating GPA of over 3.9 – we are very proud of him! It was a great day and we had a fine meal, completing almost 2 full laps while we enjoyed lunch. Notice the tomfoolery in the photo – just because you’ve got your diploma, doesn’t mean that you can’t give your sister rabbit ears for the photo. And, yes, in each of the other three pictures I took somebody has a wild-eyed crazy look – some things just never change…

This image, which captures a panorama from almost straight west to towards the NE, is a stitch of 3 images that I took after lunch, compare this to the view to the north from a visit to the Tower in 2008. What a difference 9 years makes. The Bow building is now complete and has been occupied for several years, the new Brookfield place is largely complete and Telus Sky is well underway. While the exterior of Brookfield is complete, you can see straight through the glass of the floors that are at the same level as the Calgary Tower, apparently the interior is being left unfinished to save on costs while the downtown vacancy rate remains around 25% for office towers. Telus Sky is more than 20 floors now (its the building with yellow hoarding) and is supposed to be complete next year.

This view is to the SW – looking out towards where our house is located. In theory you should be able to see our house, because we can see the tower from our master bedroom window. However, you’d need a much better camera than a Galaxy S6!

While I was doing some sorting of the digital photos, I found a set of scans that my dad had made of his slides. I thought these pictures might be interesting to post:

Comments Off on Steven’s Graduation

22 Apr 2017

Posted by under Dave's Thoughts,Mr. FixIt

Pedal Box

The progress on the Midget continues, but pretty slowly. April has been quite cold and lots of showers/rain/freezing drizzle/snow – sometimes all in the same hour. This has stretched out the MG repairs by almost three weeks now. Well it’s not just the weather – there was some time spent shopping for new tools. The pedal box, clutch and brake pedals weren’t in very good shape, paint was shot and there was some rust. Since the shapes are complex I figured that wire brush and sandpaper was not going to work out too well. Clearly I needed to sand blast. And I don’t own a sand blaster.

First things first. Although “sand blasting” is the term most people know and use, the current term is “media blast”. Sand is not used much because it has health risks; you can get silicosis from breathing the dust from the shattered grains of sand. It also is less effective than a bunch of alternatives that are available, everything from baking soda to copper slag. I settled on an inexpensive siphon system rather than a blast cabinet. The cabinet would have been nice, but I don’t know how much sand blasting I’ll be doing and I really don’t have room in the garage anyway. My air compressor is also borderline for the required air flow and pressure. Blasting takes a lot of air. Even so, the inexpensive option still cost about $120 for the gun and container, gloves, particulate filter mask, eye protection and a 25kg bag of glass bead media.

The glass bead blasting, does do a pretty good job – for about 90 seconds, til the compressor tank pressure runs down and you have to give it time to catch up. Every minute of blasting needs about two minutes of compressor time, maybe more. And, the mess! I did the first tests just outside the garage in the alley. The breeze, though light, was an issue and I soon realized that a better approach would be needed. As it turned out, the answer was to set up the drill press with a wire wheel or cup and clean as much as possible on the parts. Then, the bead blasting was only needed to get the really tight, difficult areas. That allowed me to get the three parts all done with minimal effort. I also ran the air hose round to the sheltered area beside the garage (and kept the garage door closed) where I did the blasting in a big cardboard box. The mess was, more or less, contained that way.

Today, I was hoping to paint the parts. I picked up some primer, satin black and clear coat then spent some time cleaning, degreasing and masking. Unfortunately, the afternoon kept getting colder and then it started raining – not ideal for painting which needs some warmer temperatures and not too humid. The weather forecast for the next few days doesn’t look good, so I think this project will take a while longer yet.

Comments Off on Pedal Box

« Prev - Next »