After only 10 years of not having a spare tire for my truck, I finally got busted and had a blowout early in August. Fortunately I was close to home and Brenda was able to rescue me within a few minutes, but the tire was trashed. We had to have the truck towed to have the tire replaced (thanks AMA!).
Due to evil tire company manufacturing practices; the tread pattern on the tire (only 11 months old) was no longer manufactured and I had to get 2 new tires so that the tires were matched properly. This left me with one good tire for a spare. So I bought a steel rim and had the extra tire mounted. Good news for the next blowout in 2018!!
However, there was bad news when I went to store the shiny new spare in its allocated spot under the bed of the truck. The chain hoist that lifts the spare up and secures it in place was rusted absolutely solid – there was no way to budge the mechanism to lower the chain. On to plan B; a call to the local Mazda dealer revealed that the replacement cost for the hoist is over $200! I had already spent too much on the tires and rim – my inner Scotsman wouldn’t stand for another $200 expenditure.
It only cost me a bit of skin off my knuckles to wrestle the corroded hoist from the bottom of the truck. I figured that I’d soak it in CLR or Coke or something and see if it would loosen up the mechanism. So I did a bit of googling to see what the mightiest brains of the internet could suggest – and discovered the joys of electrolysis!
It turns out that if you toss your rusty bits into a bucket with a solution of washing soda and water, add some rebar and attach a battery charger you can electrolytically convert the rust back to iron! How cunning is that??
I decided that I had nothing to lose, the hoist was completely frozen with rust, so I got a 2 gallon bucket, built an anode array with 4 lengths of rebar and some wire, then wire-brushed some holes in the rust on the hoist and attached a length of wire. The whole contraption was attached to my battery charger and left to run for a day. When I fished the hoist out the next day, I couldn’t believe it – the rust was gone! … on the outside anyway.
It turned out that because the hoist is made of multiple parts there wasn’t adequate electrical contact throughout. So I rewired it using some alligator clip leads to make sure that every piece of the hoist had a good electrical connection. Then I gave it another 22 hours in the bucket with the charger on the 2A setting. This time, when it came out, it was almost completely free of rust and just a little effort with a small pry bar had the mechanism moving!
I treated the inner workings to a big blast of motorbike chain lube, then protected the body of the hoist with Boeshield T-9 and reinstalled it under the truck. It works like a charm, the spare is happily residing in it’s rightful home and I didn’t spend $200. Its good to have a content inner Scotsman!
Some links I found to be useful:
http://antique-engines.com/electrol.asp
http://www3.telus.net/public/aschoepp/electrolyticrust.html
http://myweb.tiscali.co.uk/andyspatch/rust.htm/
http://www.instructables.com/id/Electrolytic-Rust-Removal-aka-Magic
http://www.rowand.net/Shop/Tools/Electrolysis.htm
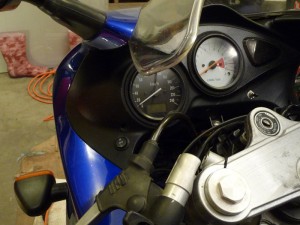
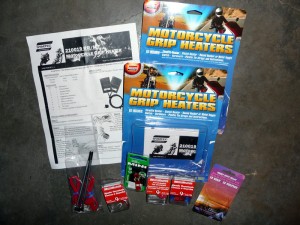
 With a switched distribution block wired in as described in Part 1 of this write up, the heated grips can be added. This is a little more involved and requires a bit of patience to pull off the grips, run the wires, replace the grips,check for clearance, drill a hole (!) in the dash and make the hookup to the power distribution block. The good news is that since the power is already done and tested this step is mostly a mechanical exercise.

